Hero image

CC's Creative Learning Shop

Average Rating3.96
(based on 28 reviews)

Teaching Art is a feast into a of colour, line, texture, space and shape. By encouraging a visual exploration in my learning I love developing a creative approach to learning in the classroom. By encouraging different techniques and an understanding of art I hope to help students appreciate visual learning more. I hope you enjoy my uploads and can use them. Please contact me if you require any further information.

159Uploads

92k+Views

28k+Downloads

Teaching Art is a feast into a of colour, line, texture, space and shape. By encouraging a visual exploration in my learning I love developing a creative approach to learning in the classroom. By encouraging different techniques and an understanding of art I hope to help students appreciate visual learning more. I hope you enjoy my uploads and can use them. Please contact me if you require any further information.
Modern Art Movements project 1 pencil -tonal shading and link to Realism - cup cakes
cccampcccamp

Modern Art Movements project 1 pencil -tonal shading and link to Realism - cup cakes

(0)
This is a step by step drawing of a cupcake - showing how to start with basic shapes and then adding in the detail and the shading. This is part of the modern movements project where students make a cake stand with various cup cakes in different art styles linked to modern movements: Expressionism, Neo-Impressionism, Fauvism, Realism, Surrealism. It also has some slides showing how to do some mark-making exercises to build up students ability to control pencil skills and to capture detail. Students can also draw from a picture of a cup-cake or preferably have a real cup-cake in front of them to draw from. Students can also use the grid method to draw a cupcake and there is a picture of this technique to help.
Modern movements project  1 - looking at different historical themes in Art -activity  mindmap
cccampcccamp

Modern movements project 1 - looking at different historical themes in Art -activity mindmap

(0)
This is part of a unit of work called Modern Movements - using cup cakes. This is the first lesson where students explore looking at what are the themes in historical art and how this relates to Modern Art This first powerpoint explores what is Art and looks at the various subjects of the past master paintings: Still-life, Landscape and Portraits. Students make a circular collage of examples of themes in Art.
Modern Art movement project plan No. 1 with starters and glossary and evaluation.
cccampcccamp

Modern Art movement project plan No. 1 with starters and glossary and evaluation.

(0)
This links to Modern movement project and has activities for starters and a list of activities to take place weekly. It has a Glossary with it for the project. it has an evaluation for project. Also resources for students to understand the movements. There is a separate bundle for the whole project- with all the schemes for each movement with starter activities. But, the outcomes are successful and students enjoy learning about the art movements and making cup-cakes in the various art styles. WEEKLY 1 Discuss Art themes 2 Realistic drawing of a cup-cake and shading skills in book 3 Pop Art – To make a 2D relief cup cake using paper cut shapes 4 To draw a cake/biscuit e using the Cubism Collage and capturing geometric shapes light to dark 5 Continuation of drawing of biscuit/cake but doing this in Paint now and capture bright colours- Fauvism 6 Expressionism Doing a polyprint of cup-cake drawing in print and rolling ink 7Doing a Neo-impressionist cake drawing 8 and 9 Surrealism outcome –adding magical creature to cake Presentation of cupcake stands Evaluation of project
Making two foldout booklets Elements of Art and Principles of Design
cccampcccamp

Making two foldout booklets Elements of Art and Principles of Design

2 Resources
These tasks relate to understanding the key building bricks in Art: Elements of Art and the principles of design and should give you 12 weeks of tasks for students to make two booklets. Making a booklet on the elements of art and then one on the principles of design. Understanding these key terms helps in enabling students to write about art and if this is completed at Key Stage 3 can be a real help at GCSE and A-level
Literacy Art Words Analysis writing frame/Evaluate, Vocabulary lists, KS3/GCSE and A-level
cccampcccamp

Literacy Art Words Analysis writing frame/Evaluate, Vocabulary lists, KS3/GCSE and A-level

(0)
These are a set of 6 sheets which can be laminated for classroom tables to help students with writing about Art. These are lists of descriptive words linked to the Elements of art and the Principles of design. These will help students to be able to write about artworks and help to broaden vocabulary. There are also words to help with writing at GCSE and support with writing under the GCSE Assessment Objectives as well. There are also sheets to help with writing frames to support weaker students when they analyse and write about their artworks. This can be used with Key Stage 3, GCSE and A-level Leaving these on the desks in the classroom support literacy learning and help students with vocabulary.
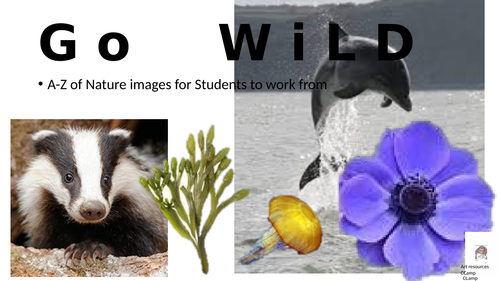
A-Z of pictures of nature/sea-life to use for Art Polyprint project KS3 Nature project
cccampcccamp

A-Z of pictures of nature/sea-life to use for Art Polyprint project KS3 Nature project

(0)
Pictures W Wading birds, Water boatmen B Bladderwrack seaweed, Basking shark, barnacles, badger A Anenomes (beadlet) abalones F Foxgloves, fox L Limpets Z Zooplankton N Nettles J Jellyfish H Herring gull S Sparrows, Sparrow Hawk, Starlings, Short-eared Owl I Iris Y Yellow wagtail, yellow horned poppy D Dolphins X oXe eye daisy M Mussels, Marram grass K Kite (black) C Cockles, Carrion crow, Chaffinch, common Newt, Common Starfish, Common Blenny, Common Shore Crab O Oystercatchers W Walney Geranium flower or similar TheIslandIsland shape filled with different wildlife T Toads (natterjack) V Viper’s bugloss Q Quercus (oak) R Razor shells, Redshank, Rays, Red Admiral butterflies, Rock Goby Robin U Umbellifer (Cow parsley) G Grey seal P Pipe Fish, Pelican’s foot shells, Peregrine Falcons, Painted Lady Butterflies.
Art Sphere pebble drawing -tonal value-KS3 making a 3D form part - shading techniques lesson 1
cccampcccamp

Art Sphere pebble drawing -tonal value-KS3 making a 3D form part - shading techniques lesson 1

(0)
This is a lesson for year 7 who are learning to shade and to create a 3D form. This is the start of a Scheme of work (Powerpoint one) where students draw a pebble and then eventually make a tile in the shape of their pebble and design a relief surface based on Hundertwasser. There are three powerpoints on Tes in a bundle linked to this unit of work or you can use it as a drawing exercise to learn to shade 3D forms. This is a short example showing different steps to get a 3D sphere form and using tonal values to develop this form. There are exercises on markmaking and how to create a tonal value. There are the main breakdown of what is needed in a sphere in tones: Light, light grey, middle grey, dark grey and black with reflected light. There are examples of showing how to shade in the direction of the form. Learning Objective was: To create a presentation on an A3 sheet of your observation drawing studies showing volume drawing of pebble To learn to draw 3D geometric shapes and firstly practise mark making and a range of tones in media: charcoal. To develop observational drawing techniques. This follows with Powerpoint Two and Three where students then begin to : Present preparatory work on a page and to plan a design for clay tile. Develop painting style like Hundertwasser (study the style of this artist) and use watercolours and understand what is a style in Art. To complete a clay tile and paint design on tile.
Elements of Art Foldout booklet: line, shape, colour, texture, space, value
cccampcccamp

Elements of Art Foldout booklet: line, shape, colour, texture, space, value

(0)
Students to be given a strip of paper and fold this into 8 sections. On the end two folds students make a front cover. There is a You tube video link to this project. In the six sections in the middle of the fold out paper there are 6 tasks for each of the elements of art. Line, Shape, Colour, Texture, Space and Value. Students on the one side of the fold out write information about the element and on the other side students are to do a drawing of the element as a creative response to each element This is a fun project and the outcomes are successful.
GCSE Art course summary sheet: CRIB sheet 3 pages : Objectives/Writing frames/Evaluation/Composition
cccampcccamp

GCSE Art course summary sheet: CRIB sheet 3 pages : Objectives/Writing frames/Evaluation/Composition

(0)
This is for your Year 10 GCSE group and gives a summary of the GCSE course in two sheets. It is a very helpful sheet summarising each objective and the requirements and the amount of pages that are needed in your sketchbook. There is also the writing framework required for artist analysis - objective one. There is also a brief outline of the principles of design and what students need to look for. Also there are helpful questions to help students evaluate their outcomes. A must for GCSE Art and Design!!
Art Polyprint project Angie Mitchell Ernst Haeckel- Nature relief polyprint  fabric wall hanging
cccampcccamp

Art Polyprint project Angie Mitchell Ernst Haeckel- Nature relief polyprint fabric wall hanging

(0)
This is a key stage 3 project where students do a polyprint on fabric using printing inks. This is a short 6 week project but could be developed to incorporate embellishments and sewing skills to fabric. I did this with year 8 and it took 6 weeks. Student enjoyed the outcome and it could have been made into a cushion for each student but we made a class fabric wall hanging. (There is a second Powerpoint in a Bundle which has all the pictures used for students to work from - A-Z of nature pictures) Artists used: Angie Mitchell and Ernst Haeckel Resources required Polyprint blocks Printing ink Rollers Tables to roll out on Fabric square per child Paper for test prints Research sheet for drawings and artist research. Project schedule 6 weeks The resources for the students to work from. Each student chooses what they would like to draw. The steps to take while making the print and examples of student’s outcome. Students begin by researching Angie Mitchell and Ernst Haeckel and make up a sheet with these two artists and their drawings. The drawings they do of one of the pictures of the slide pictures of animals and bits of nature from A-Z. Students choose which animal or fish or plant they would like to draw. Students spend time doing a detailed drawing and design a border pattern for this work in black and white. Success criteria of drawings To use fine lines and to capture quality detail To concentrate on negative and positive shapes To develop a border pattern from nature around the drawing To try to layer up your drawing with foreground and background shapes The students drawings are then photo-copied and transferred to the polyprint block. Students use the photocopy to press through onto polyboard. The students are given a square and a strip of polyprintboard . Students first of all experiment printing on paper with their design and border. Students can do a black and white print or do a polyprint print of two colours overlaying their inks. The slide presentation gives you also opportunities for reflection and evaluation of outcome at the end. I have presented my artists in my book I have compared the works of 2 nature artists I have written a short paragraph on the style of artists I have a careful line drawing of my subject I have created my own artwork based on my research of subject colour I have a plan for my print design and have written about relief printing I have tested working with polyprints Student outcome is a wall-hanging and we sewed all the students outcomes together to make a fabric collage of squares.
Art of St. George and the Dragon: Black card stained glass paper cut out project with tissue paper
cccampcccamp

Art of St. George and the Dragon: Black card stained glass paper cut out project with tissue paper

(0)
There is one powerpoints - this focuses on the St. George images and on Marc Chagall. In the project students use their imagination and to draw dragons and St. George’s battle. Students look at the Stained Glass artist Marc Chagall and then make up their St. George story on paper to transfer to black paper. There are instructions and worksheets. Students will need to use a stanley knife and safety working with blades is imperative for this project. Students need to have very simple designs and stylise their drawings into basic shapes. Therebis also a section om using a computer to make a symmetry pattern. WEEKLY Plan Two lessons weekly 7 weeks to 1/2To look at examples of St George and the Dragon and to draw out one’s own St. George and Dragon picture. 1/2. To look at examples of Stained Glass windows and look at the artist Marc Chagall. 3/4 To simplify the designs of St. George and the Dragon into thick lines and shapes to transfer onto black paper with chalk. 5 /6 To trace designs onto black paper shapes and begin to cut the negative shapes around the lines. To simplify these lines one can take the students to a computer room and do a basic symmetry pattern and lay this over their drawing and students begin to simplify the shapes into geometric forms. 7 / 8.- To make up a sheet of tissue paper on plastic paper to put behind the black paper cut out. Tear or cut the tissue paper into shapes at random and just lay this down on plastic with PVA glue. When this is dry the tissue paper will peel off the plastic. 11 / 12 – To continue to draw into black paper and put together. 13 – Evaluation of project To design a picture of St. George and the dragon’ on paper using resources in the first powerpoint. To refine the details of the designs into simple outlines-Teachers could photocopy and enlarge details to help students. To look at the Stained Glass artist Marc Chagall (second powerpoint) and to think how they could use his style in their work To transfer designs to black paper and to cut the negative shapes around the lines using the stanley knife. To make a sheet of coloured paper on a plastic sheet using PVA glue and tissue paper.
Xmas Collage Art Textile 12 Days of Xmas using Aminah Robinson’s mixed media collage
cccampcccamp

Xmas Collage Art Textile 12 Days of Xmas using Aminah Robinson’s mixed media collage

(0)
Attached are three powerpoints for developing a KS3 Collage in Fabric on the 12 Days of Xmas and the artist Aminah Robinson. Students use the ‘resources’ powerpoint to draw ideas to make up their own design for the 12 days of Xmas. Class divided and each child gets a different day to design. I used Black velvet fabric as my backing fabric and each time the student did their drawing I traced this onto different coloured fabric shapes and students then cut this out and pritt sticked this onto the black velvet fabric. see powerpoint of song '12 days of xmas ’ for resources see powerpoint Artist interpretation and learning about different fabric artists. see powerpoint on stitchung techniques Thirdly, students then cut their designs out in fabric - I used transfer receipt like paper so students could trace onto the fabric and then cut out. Finally students then embellish their fabric with different stitches and I have a powerpoint with video links on how to do the different stitches: running stitch, blanket stitch, satin stitch, chain stitch and daisy stitch…
Art exam short evaluation drawing:Yr 7 rope, Yr 8 fabric pattern/peg/brush and Yr 9 portrait drawing
cccampcccamp

Art exam short evaluation drawing:Yr 7 rope, Yr 8 fabric pattern/peg/brush and Yr 9 portrait drawing

(1)
This is a standardisation test for KS 3 testing drawing skills. You will need to as a teacher to resource the following for students: Year 7 Thick rope tied up, Year 8 Piece of fabric square with a peg or/and ribbon or a paintbrush to replace peg, Year 9 Xmas baubels or large spoons that have a reflection. This did not cost too much to put together for a yearly assessment. Year 7: Rope drawing - looking at the ability to create volume with tone and then to add in the pattern lines of the rope texture with the volume effect. Some students are able to capture good line patterns showing good design skills and line qualities. More able students are able to capture the volume. Year 8: Peg/large paintbrush and Fabric drawing - This is an exercise in capturing the volume, pattern and shading and accurate perspective drawing of the peg. Some students are able to show this more accurately and can show good tonal variations and the illusion of the 3D form in the peg and the brush. The lovely use of colour in the fabric supports students with strong design skills and pattern Year 9: Self identity drawing a portrait in a spoon or a bauble supports a theme on Self identity in year 9 and students can re-fine their skills in drawing themselves carefully in a bauble. Looking at volume and accurate tonal shading to draw a sphere with the distorted self portrait. Students enjoy capturing themselves having learnt about portrait drawing they can begin to excel in trying to create an illusion of themselves.
Introduction to Art in Year 7
cccampcccamp

Introduction to Art in Year 7

4 Resources
This is a unit of work for the first 12 weeks at school. There are questions to assess the students knowledge of Art from KS2 and then a project to assess he strengths and skills of the students. This is a diagnostic project looking at the Illusionary, Spatial, Tactile, Cartographic skills of the students with tasks to do. There is also a fun project on making a sketchbook and giving prompts to help students to be creative in the Keri Smith powerpoint.
Ks3 Yr7Intro to Art:1st project Diagnostic, assess strengths/skills. Drawing, Collage, Design, 3D
cccampcccamp

Ks3 Yr7Intro to Art:1st project Diagnostic, assess strengths/skills. Drawing, Collage, Design, 3D

(0)
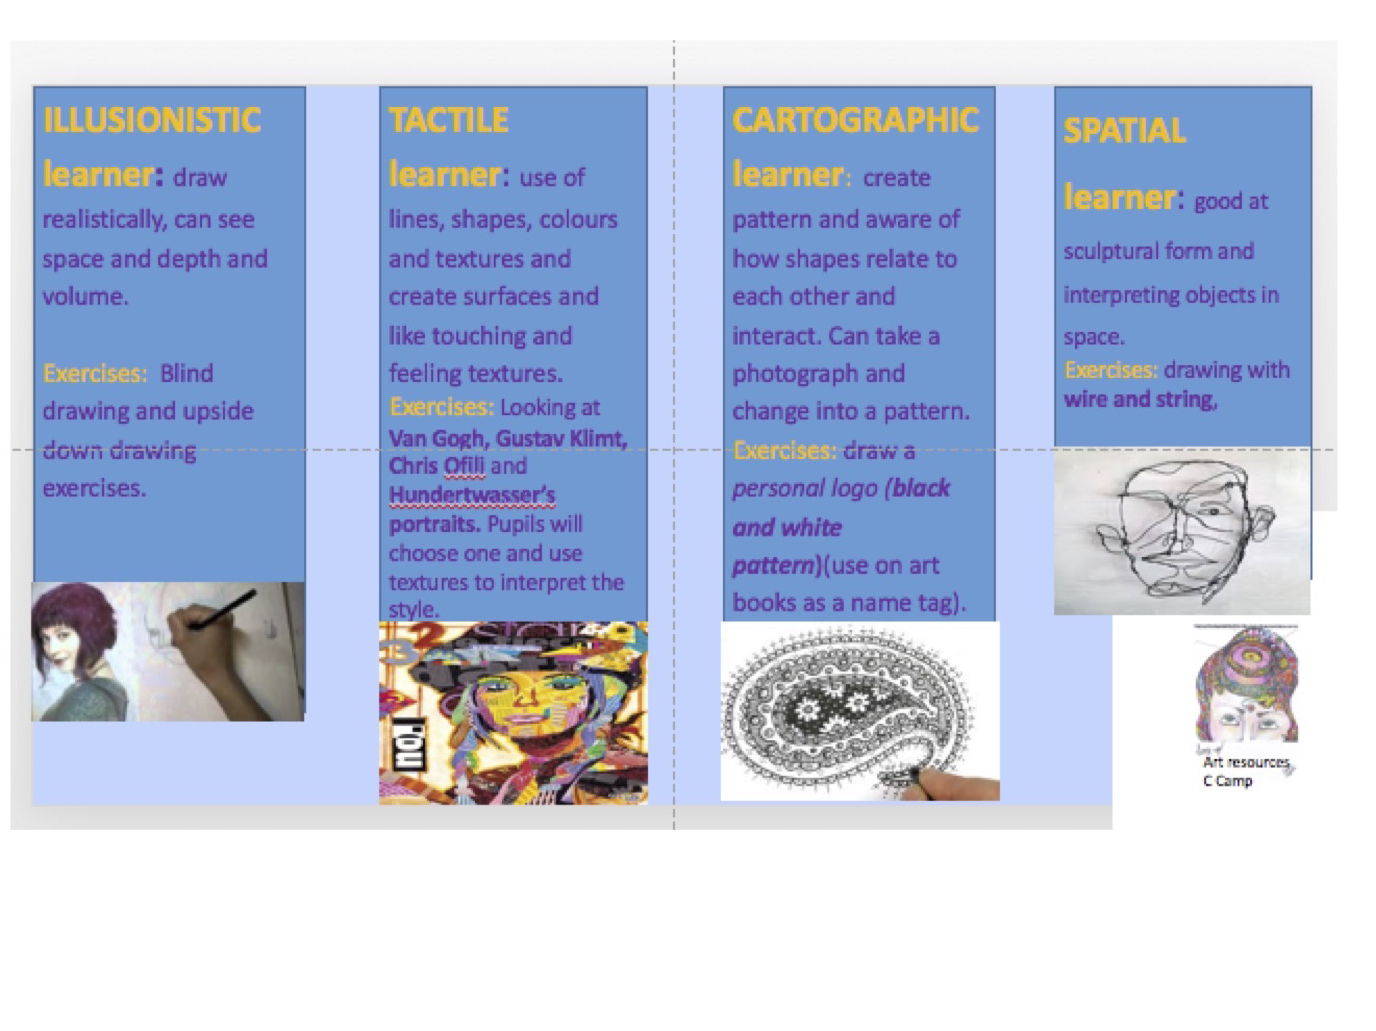
This tasks help to assess abilities and specific skills in Art. This helps to establish a Baseline Assessment for Art after having completed all these exercises. This should take 10-12 lessons. Please work through each exercise carefully. The aim of this diagnostic assessment is to look at specific skills used in art. This diagnostic study is to try to assess different skills in Art. The tasks given are for the different learning/skills in art and it allows the pupils to explore these. There are tasks given for each area of learning. Areas of learning with task: ILLUSIONISTIC learner: draw illusionistically, blind drawing and upside down drawing exercises. CARTOGRAPHIC learner: draw a personal logo (black and white pattern)(use on art books as a name tag). TACTILE learner: Looking at Van Gogh, Gustav Klimt, Chris Ofili and Hundertwasser’ portrait works, their use of lines, shapes, colours and textures. Pupils will choose one of these artists to develop in a tactile way using re-cycled materials. SPATIAL learner: drawing with wire and string, assess whether good at sculptural form. Furthermore, assess the students ability to write ANALYTICALLY and to critically analyse a painting… The pupils will also need to self assess and evaluate their outcomes. At the end of this exercise we would be able to assess pupils strengths and weaknesses in art at KS 3 and there are many opportunities in the presentation for evaluation. How to create an illusionistic space and to draw from first hand observation using blind drawing skills, contour line drawing, upside-down drawing and mark-making. Focus on how to shade using dark and light tones with pencil and biro pens and focus on mark-making. 3 a To critically analyse other artist’s styles and techniques and select and question critically, making reasoned choices when developing work from observation. 3 b. Explore tactile qualities and select a range of materials to interpret a style of an artist. Develop a portrait using tactile materials. Investigate how to express ideas using design skills and design processes and the formal elements like line, colour and flat shapes with patterns Exploring drawing with a 3D structure and looking at shape and line with construction of wire developing spatial recognition. Analysing an artwork and investigating the formal elements used in an artwork. Reflect on and evaluate one’s own and others’ work, adapting and refining the outcomes. Presentation should also be assessed at the end of these exercises. Students should also always write a heading and the lesson objective clearly at the top of each page. There are clear evaluation sheets and assessment opportunities in the unit of work. All tasks are presented with Lesson Objective and clear practical tasks.
Art A-level drawing styles- Artist analysis of drawings with task - linked to human form
cccampcccamp

Art A-level drawing styles- Artist analysis of drawings with task - linked to human form

(0)
• Learning Objectives To reflect on examples of copies of drawings of different artists and illustrators and analyse the formal elements: shapes, tone, form, lines, texture, and marks. • To investigate and interpret a variety of selected artists and discuss their sense of style and markmaking • To study drawings with reference to their visual literacy and the formal elements (tone, texture, colour, line, form). • To discover the different mark making skills of a number of different artists. • To research, investigate and develop ideas in a personal way on an A2 sheet. To develop a visual work of practical responses with annotations. In this task students are to analyse the drawing styles of particular artists and begin to interpret these different artist’s styles in drawings of their own. Students use the formal elements to analyse the artists and develop drawings using their own subject as a response with annotations. • Students draw the hand/feet or a subject of their choice in particular signatures of a selection of artists. • To reflect on examples of copies of drawings of different artists and illustrators and analyse the formal elements: shapes, tone, form, lines, texture, and marks. • Try to use different drawing techniques as highlighted by the masters. This is a good start to critical contextual analysis and gets students to look at a number of artists and develops their visual analysis skills . Students to end with an A2 or A1 drawing sheet showing their subject in various styles.